 You must register to submit content to State Symbols USA - it's FREE! Once approved, you can login and edit a page, add a new page, add a photo, or add a video.

Create pages for your community and take photographs to illustrate your pages; hometowns, landmarks, parks, historic buildings, and historic markers. What a great class project! All submitted content is reviewed and approved by our staff before publication, so DON'T BE SHY! CONTACT US with questions.

HOW TO EDIT A PAGE - 5 STEPS
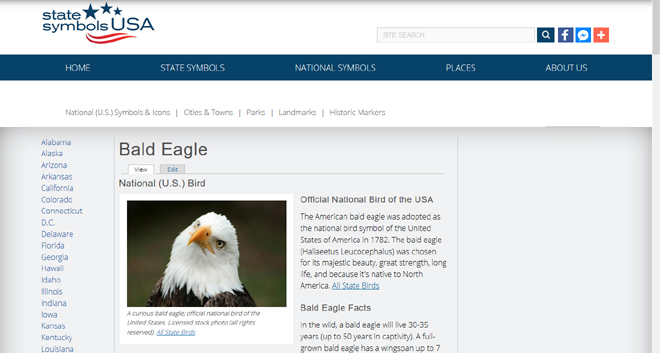
1. ENTER EDIT PAGE. Click the "Edit" tab (  ) below the page's Title (you must login to see the "Edit" tab);

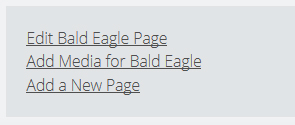
Or click the "Edit Page" link below the article. Example: "Edit Bald Eagle Page;"
2. MAKE EDITS. Scroll down to the "Main Description" box to edit the article;

3. CREDIT LINE. If you want credit for your submission, type your information at the end of the article ("Contribution by ..."). A link to your website in the credit is usually approved (example).
4. SOURCE LINKS. Where did you research your facts? Use "Source" boxes (below "Main Description") to add appropriate links;

Enter the Name of the source page in the "Title" box, and paste the web page address in the "URL" box. We generally do not approve "dot com" links, but there are exceptions (.com is short for "commercial"). If you need to enter additional links, use the "Add Another Item" button ( ).
).
Please provide Source links if you add text content to an article. If your information source is not a website, type a description of your source(s) at the bottom of the article in the "Main Description" box.
5. SAVE YOUR WORK! Click the "Save Item" button at the bottom of Edit page to save your changes ( ). You'll see a confirmation message;

Your submission will be reviewed by a member of our staff before publication to the live website.
HOW TO MAKE A NEW PAGE - 16 STEPS
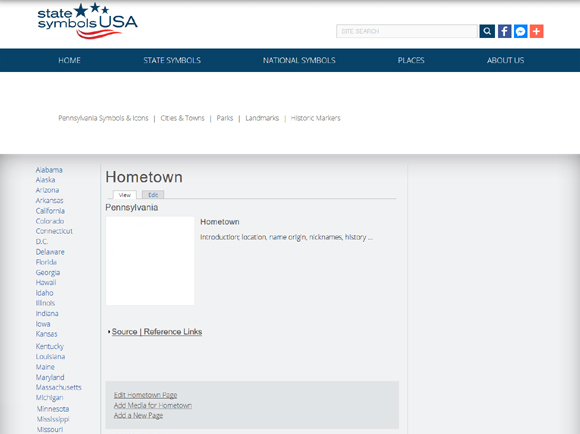
1. SITE SEARCH. Perform a site search (top of page) to see if the page you want to create already exists;

If there's already a page on your topic, please edit the existing page.
2. ADD A NEW PAGE. Click the "Add a New Page" link at the bottom of any category or article page;

3. PAGE TITLE. Complete the "Title or Name" text box on the "Create New Symbol or Item" page;

Type the Name of a place (town or city, landmark, park, or historic marker), a state symbol, or a historic person's name.
4. US STATE. Click drop-down arrow and select the state your topic is associated with;

5. SUBTITLE. Optional. Our staff usually completes this field.
6. ARTICLE HEADER. Optional.
7. PRIMARY IMAGE. Optional. If you have a primary image (how to find a photo), click on "Browse" to upload a photo;

"Browse" opens the "Media Browser" box. Follow steps 3-9 under "HOW TO ADD A PHOTO" (below), then proceed to step 8;
8. ITEM TYPE. Click drop-down arrow and select an "Item Type" for your page; a "Place," a "Symbol | Official Item," or a "Historic| Iconic American.

9. CATEGORY. If the Item Type is "Place" or "Symbol," you must select at least one category on the list that appears.
10. ADDRESS. Optional. If "Place" is the Item Type, an "Address" section appears; enter an address if you want a Google map to appear on the page.
11. SHORT DESCRIPTION. Optional. "Short Description" is a summary of the article's content for search engines that does not appear on the published page. Our staff normally completes this field.
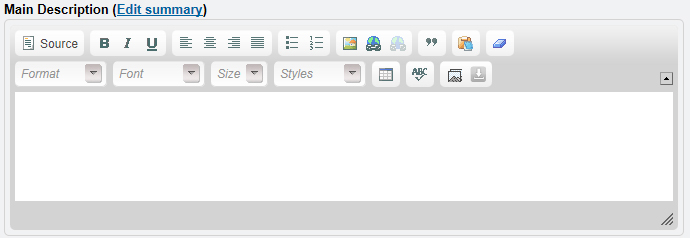
12. MAIN DESCRIPTION. Click inside the "Main Description" box to position your cursor. Type or paste in your article text. Phrase facts in your own words! If you quote a source in your article, put quotation marks around the quote and identify the source in the article.
13. CREDIT. If you want credit for your submission, type your information at the end of the article ("Contribution by ..."). A link to your website in the credit is usually approved (example).
14. SOURCE(S). Where did you research your facts? Enter the Name of the source page in the "Title" box, and paste the web page address in the "URL" box;

We generally do not approve "dot com" links, but there are exceptions (.com is short for "commercial"). Click the "Add another item" button if you have more than two sources: .
.
If your information source is not a website, type a description of your source(s) at the bottom of the article (in the "Main Description" box).
15. REFERENCES. Adding Reference links is optional. Enter the name(s) and URLs of other reputable web pages on this topic if you feel our readers will benefit. Click "Add another item" if you have more than two:  .
.
16. SAVE YOUR WORK! Click the "Save Item" button at bottom of the page to save your changes: . You'll see a "Submission Received" confirmation message. The new page will be reviewed by a member of our staff before publication to the live website.
ADD MEDIA
Not good with a camera? Many photos are available with a public domain or creative commons license to illustrate your page. Find a photo on the web.
HOW TO ADD A PHOTO - 9 STEPS
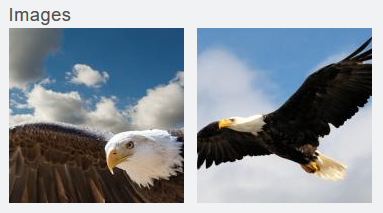
1. ADD MEDIA. Click the "Add Media for Page" link below the article to add photo(s) to a page;

2. CREATE NEW FILE. The "Create New File or Media" page opens. "Image" is the default selection under "Media Type," so just click the "Browse" link under "Attach media;"
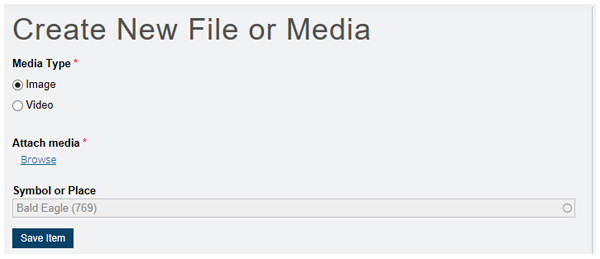
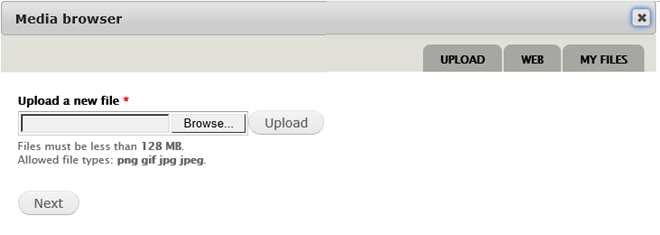
3. MEDIA BROWSER. The "Media Browser" box opens. Click the "Browse..." button ( );
);
4. SELECT YOUR FILE. A file explorer box opens where you can navigate to your photo and select it. The name of the selected image will appear in the "File name" text box;
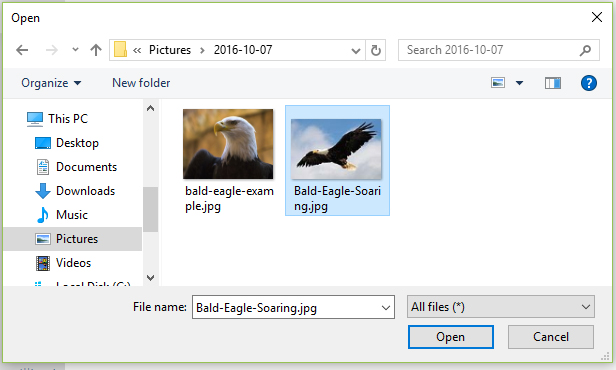
5. OPEN THE FILE. When the desired photo has been selected, click the "Open" button ( ). You return to the Media browser, which now shows the location of the file you selected in the "Upload a new file" text box;

6. UPLOAD THE FILE. Click the "Upload" button ( ). The Media browser now indicates the file has uploaded;
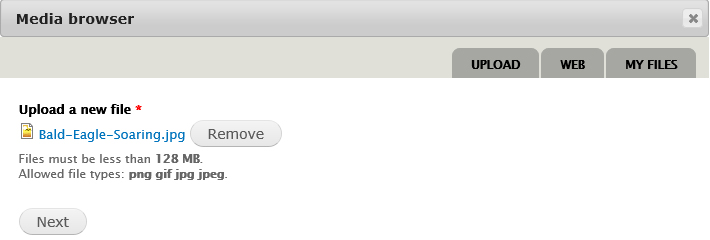
7. IMAGE DESCRIPTION. Click the "Next" button in the Media browser ( ). This opens the description area for the photo; information entered here will be used in the image caption;
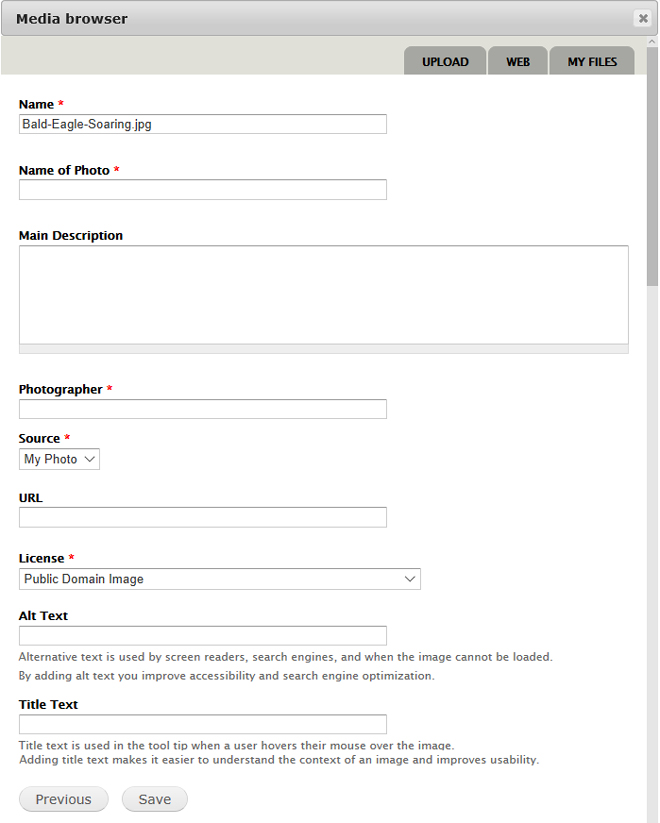
7.1 Name of Photo. Type the topic of your photo. For our example, I would type "Bald eagle soaring" (no period).
7.2 Main Description. Optional - add details about the photo here (where the shot was taken or other description).
7.3 Photographer. Type the name of the photographer.
7.4 Source. "My Photo" is the default selection. Click the drop-down arrow to select a different image source (Flickr, Wikipedia, USFWS, USDA, or other source);

7.5 URL. Paste the web address (URL) of the original image if it was copied from the web.
7.6 License. "Public domain" is the default selection. Click the drop-down arrow to make a different selection;
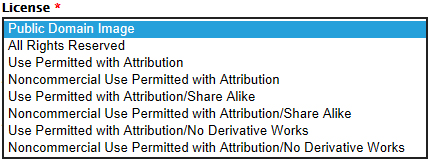
See How to Find a Photo on the Web for details on the different copyright licenses.
7.6 Alt Text. Optional. "Alternative Text" is used by screen readers, search engines, and when the image cannot be loaded. By adding "Alt Text" you improve accessibility and search engine optimization.
7.7 Title Text. Optional. "Title Text" is used in the tool tip when a mouse hovers over the image. Adding "Title Text" makes it easier to understand the context of an image and improves usability.
8. SAVE IMAGE DESCRIPTION. After completing the required fields in the image description box (required fields have a red asterisk), click the "Save" button:  . This brings you back to the "Create New File or Media" page, which now displays your photo;
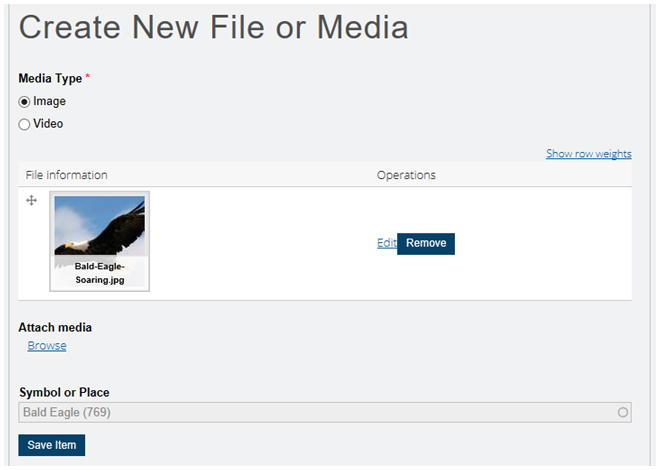
To upload a second photo to this page, click the Browse link again (under "Attach media").
9. SAVE YOUR WORK! Click the "Save Item" button on the "Create New File or Media" page: . You'll see a "Submission Received" confirmation message;

Your submission will be reviewed by a member of our staff before publication to the live website.
HOW TO ADD A VIDEO - 7 STEPS
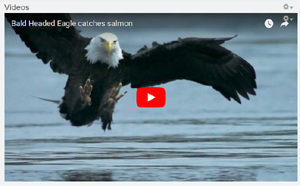
1. ADD MEDIA. Click the "Add Media for Page" link below the article;

2. CREATE NEW FILE. Select "Video" as the "Media Type" on the "Create New File or Media" page;
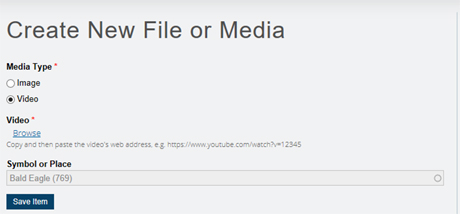
Click the Browse link under "Video" to open the Media browser.
3. MEDIA BROWSER. In the Media browser, paste the video's embed code in the "File URL or media resource" text box, then click the "Next" button:  to open the video description section;

3.1 FIND EMBED CODE. On YouTube, click the "Share" link under the video;

3.2 COPY EMBED CODE. Click the Embed link and copy the embed code;

3.3 PASTE EMBED CODE. Paste the embed code in the "File URL or media resource" text box in Media browser;

3.4 CLICK NEXT. Click the "Next" button in Media browser :  to open the video description section.
4. DESCRIPTION. The description section opens. If it's a YouTube video, the "Name" box is already completed;
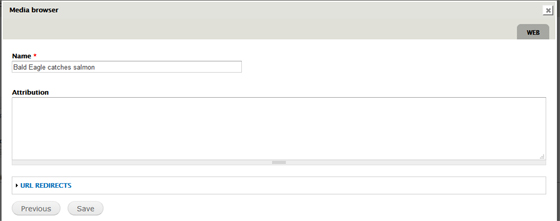
Leave the "Attribution" box blank and click the "Save" button:  to save the file description.
5. SAVE FILE. Click "Save" button again in Media browser:  to save the new video file;

6. SAVE TO PAGE. The "Create New File or Media" page now shows the new video file you created. Click the "Save Item" button  to assign the video to the Bald Eagle page;
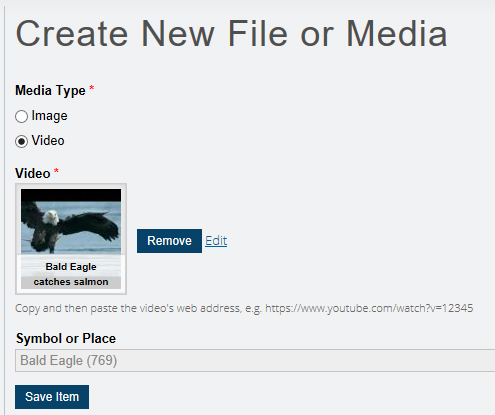
7. SUBMISSION RECEIVED. After you click "Save Item" button: you'll see a Submission Received" confirmation message;

Your submission will be reviewed by a member of our staff before publication to the live website.
